Constructing an outdoor kitchen frame yourself is certainly feasible and has become a popular project for homeowners looking to add value and enjoyment to their outdoor space. There’s a special sense of accomplishment that comes with completing such a project, transforming your backyard into a prime spot for gatherings and culinary adventures.
Shortcut to article sections:
Many of our clients express a desire to undertake the construction of an outdoor kitchen while keeping a close eye on expenses. Nowadays, with the wealth of DIY tutorials available on YouTube and various online platforms, it’s easier than ever to find step-by-step guidance for almost any project.
However, it’s crucial to consider the credibility of these resources. While many builders can offer general construction advice, specialized knowledge is essential when it comes to the unique demands of building an outdoor kitchen that is not only aesthetically pleasing but also safe and functional.
Let’s explore some of the materials and techniques you might consider when planning the frame for your DIY outdoor kitchen.
The most popular outdoor kitchen frame options typically offer a balance between durability, aesthetics, and cost-effectiveness.
Commonly used materials and methods:
Wooden Frames:
-
- Pressure-Treated Lumber: Common due to its cost-effectiveness and ease of use. It’s treated to resist moisture, decay, and termites, which is essential for outdoor conditions.
- Cedar and Redwood: Naturally resistant to rot and pests, these woods are more expensive but offer a natural and premium finish.
Metal Frames:
-
- Galvanized Steel Studs: They are strong, durable, and resistant to rust and corrosion, making them a popular choice for framing.
- Aluminum: Lightweight and corrosion-resistant, aluminum is a good option for coastal areas with salty air.
Masonry Frames:
-
- Concrete Blocks: Often used as a substrate for stone veneer, stucco, or tile, concrete blocks are durable and provide a solid structure.
- Brick: Offers a traditional and sturdy option, often used in conjunction with a concrete footing for added stability.
Stone and Veneer Frames:
-
- Natural Stone: Provides a high-end, durable finish but can be more expensive and heavier, requiring a strong foundation.
- Manufactured Stone Veneer: Easier to work with and lighter than natural stone, it offers the appearance of stone at a reduced cost.
Modular Systems:
-
- Prefab Outdoor Kitchen Kits: These are ready-to-assemble and can include various materials like stainless steel, composite, or aluminum. They are quick to install and come in various designs.
- Modular Stainless Steel Cabinets: Stainless steel offers a modern look, is highly durable, easy to clean, and resistant to the elements.
Combination Frames:
-
- A combination of the above, such as a wood or steel frame with a masonry or stone veneer, allows for customization and can offer both structural integrity and a high-quality finish.
The choice of material often depends on the specific requirements of the project, such as budget, climate, design preference, and the level of maintenance one is willing to undertake. It’s important to consider the pros and cons of each material and how they align with the goals of your outdoor kitchen project.

Wooden Frame:
Building an outdoor kitchen frame with wood, particularly pressure-treated lumber or naturally resistant woods like cedar and redwood, involves several steps. Here’s how you can build an outdoor kitchen frame using these materials:
Pressure-Treated Lumber Frame
Pressure-treated wood is infused with preservatives to resist moisture, decay, and termites, making it a suitable choice for outdoor environments.
Steps for building with pressure-treated lumber:
Design and Layout:
-
-
- Draft a detailed plan of the kitchen layout, including dimensions for appliances, storage, and workspaces.
- Mark out the footprint of the kitchen on the ground where it will be built.
Foundation:
-
-
- Depending on the design, lay a concrete slab or concrete footings to provide a stable base for the wood frame.
Framework Construction:
-
-
- Cut the lumber to the required lengths for the base, walls, and counters.
- Assemble the base frame and secure it to the foundation.
- Erect vertical support beams at appropriate intervals for wall structures.
- Connect horizontal beams on top of the vertical supports to create the wall frames.
- Install additional horizontal beams for counter support.
Supports for Appliances and Countertops:
-
-
- Frame out the specific areas where appliances will be housed, ensuring to leave adequate ventilation and utility hookups.
- Construct the frame to support the weight of countertops and any built-in appliances.
Sheathing and Cladding:
-
-
- Apply a waterproof barrier or sheathing over the wood frame to protect it from the elements.
- Cover the frame with an appropriate outdoor-rated cladding material, such as stucco, tile, or stone veneer.
Cedar or Redwood Frame
Cedar and redwood are naturally resistant to rot, decay, and pests, making them attractive for outdoor kitchen frames without the need for chemical treatments.
Steps for building with cedar or redwood:
Design and Layout:
-
-
- As with pressure-treated lumber, start with a clear design and footprint for your kitchen.
- Ensure all wood pieces are sized and planned for to minimize waste.
Foundation:
-
-
- Build on a concrete foundation to prevent direct contact with the ground and extend the life of the wood.
Framework Construction:
-
-
- Construct the base frame, ensuring that all wood is properly sealed and treated for additional protection.
- Create vertical and horizontal supports as per the design, considering the specific grain patterns and color variations of the wood for aesthetic placement.
Countertop and Appliance Supports:
-
-
- Frame out the designated areas for each appliance, paying attention to the specific needs of cedar or redwood, which may include additional support due to their lower density compared to pressure-treated lumber.
Finishing Touches:
-
-
- Seal the wood with a high-quality sealant suitable for food prep areas.
- Choose a countertop material that complements the natural beauty of the wood, such as soapstone or granite.
- Clad the exterior in a matching or complementary wood siding, or leave it natural with a robust sealant.
For both types of wood, it’s crucial to ensure that all joints are tight and that the frame is square and level. The wood should be regularly maintained with a sealer or stain to protect against the weather and UV damage. While working with wood, it’s also essential to consider local building codes and the recommended practices for constructing outdoor kitchens in your region.

Metal Frames: Galvanized Steel Studs, Aluminum Studs
Steel frame kits are now sold in major hardware stores. Framing your outdoor kitchen with steel rods can be a great DIY project. The next step is to figure out how to face your kitchen using concrete, tile, stucco or a finish of your choice. That part will need to be completed by a contractor unless you have the knowledge and tools!
Galvanized Steel Stud Frame
Galvanized steel studs offer excellent strength and are resistant to rust, making them a durable choice for outdoor kitchen frames. Here’s a breakdown of the process to build a frame with galvanized steel studs:
Steps for building with galvanized steel studs:
Design and Layout:
-
-
- Plan the layout of your outdoor kitchen, indicating the positions for appliances, storage, and work areas.
- Outline the kitchen’s footprint where it will be constructed, ensuring the space is level.
Foundation Preparation:
-
-
- Prepare a solid foundation, which can be a concrete slab or footings, to anchor the steel frame.
Frame Assembly:
-
-
- Cut the galvanized steel studs to the necessary lengths for the base, walls, and counters.
- Secure the track (the horizontal part of the steel framing) to your foundation.
- Insert the studs (the vertical components) into the track and fasten them at the desired spacing.
- Use special steel screws designed for metal studs to assemble the frame.
Reinforcement and Supports:
-
-
- Add horizontal braces between studs for added strength and to support countertops and appliances.
- Reinforce the frame at points where heavy appliances will be placed.
Attachment Points:
-
-
- Install plywood or cement board over the steel frame as a backing for finishing materials or for attaching cabinets.
Exterior Cladding:
-
-
- Cover the frame with an appropriate weather-resistant cladding material, such as stucco, stone veneer, or tiles.
Aluminum Stud Frame
Aluminum is lightweight, corrosion-resistant, and often used in coastal environments where salt air can cause significant corrosion to other materials. Here’s how to build a frame using aluminum studs:
Steps for building with aluminum studs:
Design and Layout:
-
- As with steel studs, begin with a comprehensive layout plan for your outdoor kitchen.
- Make sure the area for the kitchen is clear and level.
Foundation Preparation:
-
- Even though aluminum is lightweight, a firm foundation like a concrete slab is still recommended to anchor the structure securely.
Frame Assembly:
-
- Cut aluminum studs to length for the frame’s base, walls, and countertop structure.
- Assemble the aluminum track to the foundation, followed by the vertical aluminum studs.
- Use aluminum or stainless steel screws to prevent galvanic corrosion when assembling the frame.
Reinforcement and Supports:
-
- Install additional braces and supports where the kitchen will bear more weight, such as areas holding the grill and sink.
- Ensure the frame is rigid and capable of supporting countertops and appliances without flexing.
Attachment Points:
-
- Attach a suitable backing like marine-grade plywood or a non-corrosive cement board over the frame to prepare for the finish.
Exterior Cladding:
-
- Finish the frame with a weatherproof cladding that fits the design aesthetics, such as waterproof panels, stone veneer, or metal sheeting designed for outdoor use.
For both galvanized steel and aluminum frames, it’s important to:
- Verify that the frame is square and level during assembly.
- Consider using flashings or other waterproofing materials at critical points to prevent water ingress.
- Follow local building codes regarding outdoor structures and fire safety, especially concerning clearances around grills and cooktops.
- Ensure that all utilities (gas, water, electricity) are installed by qualified professionals and are safely integrated into the metal framework.
Metal frames typically require fewer maintenance efforts compared to wood and can provide a more modern look to the outdoor kitchen design. When working with metal, it’s also important to protect against sharp edges and to use appropriate protective gear.

Masonry Frames: Concrete Blocks, Bricks
Brick Frame:
Constructing a durable and attractive kitchen frame from bricks not only lays the groundwork for a functional space but also infuses rustic charm into your outdoor oasis.
Whether you’re a seasoned DIY enthusiast or a newcomer ready to get your hands a little dirty, this guide will walk you through each step of crafting your brick outdoor kitchen frame, ensuring your build is as enjoyable as the alfresco dining experiences to come.
Planning and Preparation
Start by drafting a practical design for your outdoor kitchen, detailing the layout and precise measurements. This plan will serve as the roadmap for your project. Assemble all the necessary materials, ensuring you have a sufficient number of bricks, mortar mix, concrete for the footing, rebar or mesh for reinforcement, and tools such as a trowel, level, and brick jointer.
- Design: Sketch out your design, noting the dimensions and where you’ll place the grill, countertops, and any other features.
- Location: Choose a level spot, preferably close to your indoor kitchen for ease of food preparation and cleanup.
- Materials: Calculate the number of bricks you’ll need based on your design. You’ll also need mortar, rebar or metal mesh for reinforcement, concrete for the footing, and possibly fire bricks for areas that will be exposed to high heat.
- Tools: Gather tools such as a trowel, level, brick set, mortar mix, mixing tub, wheelbarrow, shovel, and jointer.
Laying the Foundation
A solid foundation is critical. Excavate a trench to the appropriate depth, below the frost line if necessary, to prevent shifting during freeze-thaw cycles. Pour a concrete footing to create a stable base for your brick frame. Give the concrete time to cure fully before proceeding—this usually takes several days.
- Footings: Dig a trench for the footing, ensuring it’s level and deep enough to go below the frost line (if applicable to your climate).
- Concrete: Mix and pour concrete into the trench to create a stable footing.
- Curing: Allow the concrete footing to cure completely, which may take several days.
Building the Frame
- First Layer: Lay the first layer of bricks on the footing, using a layer of mortar between the footing and bricks. Check for level and make adjustments as needed.
- Subsequent Layers: Continue building up the layers of bricks, applying mortar between each brick. Stagger the bricks so the joints don’t line up; this increases the structure’s strength.
- Reinforcement: Every few layers, add a horizontal layer of metal mesh or rebar to reinforce the structure.
- Corners and Edges: Pay special attention to corners and edges, ensuring they’re square and level.
- Openings: Leave spaces for your grill, storage, and any other features you plan to include. You can use wood to create temporary frames that help keep the shape while you lay the bricks around them.
- Leveling: Regularly check for level and plumb as you build up.
Finishing Up
- Mortar Joints: Once the brick frame is up, strike the mortar joints with a jointer for a smooth, finished look.
- Curing: Allow the brickwork to cure. The time needed can vary depending on the weather and the mortar you’ve used.
- Inspection: Inspect the structure thoroughly for any gaps in the mortar and fill them as needed.
Adding Countertops and Inserts
- Countertops: Once the frame is built and cured, you can add a countertop by laying a solid slab of stone, tile, or another suitable material on top.
- Inserts: Install your grill and any other appliances or accessories into the spaces you’ve left for them.
Safety Check
- Stability: Make sure everything is stable and secure.
- Clearance: Check that you have the necessary clearance for the grill and any other heat sources from combustible materials.
Tips:
- Always wear safety gear like gloves and goggles when working with bricks and mortar.
- Keep the mortar at the right consistency – it should be like peanut butter, not too dry and not too runny.
- Clean any excess mortar off the bricks as you go to keep a clean look.
- If you’re not experienced with masonry work, consider practicing on a smaller project first.
Building an outdoor kitchen frame with bricks can be a rewarding project that adds value and enjoyment to your home. Take your time with the process to ensure a safe and sturdy result.

Concrete Block Frame
Concrete blocks, also known as cinder blocks, provide a sturdy and durable frame for an outdoor kitchen.
Steps for building with concrete blocks:
Design and Planning:
- Determine the layout of your kitchen, accounting for appliances, storage, and workspace.
- Mark out the kitchen area, ensuring the space is level and prepared for construction.
Foundation:
- Lay a concrete slab foundation or pour footings where the blocks will be placed, making sure it’s properly leveled and cured.
Block Laying:
- Start by laying a bed of mortar on the foundation where the blocks will sit.
- Place the first row of concrete blocks, checking for level and straightness.
- Continue stacking the blocks, applying mortar between each and checking for plumb and level with each layer.
Reinforcement:
- Insert rebar vertically in the holes of the blocks and fill with concrete for additional strength.
- For longer spans or where appliances will be installed, reinforce the structure with lateral supports.
Countertop Support:
- Create a solid frame on top of the blocks that can support the weight of the countertop, using rebar and concrete or additional block caps.
Finishing:
- Apply surface bonding cement to the outside of the block frame for a smooth finish.
- Alternatively, apply a veneer of stone, stucco, or tile to match your outdoor decor.

Stone and Veneer Frames: Natural Stone, Manufactured Stone Veneer
Natural Stone Frame
Building an outdoor kitchen frame with natural stone involves creating a sturdy and attractive structure that complements natural landscapes.
Steps for building with natural stone:
Design and Planning:
- Begin with a detailed plan that specifies the dimensions and layout of your outdoor kitchen.
- Natural stone varies in size and shape, so factor in extra time for fitting and shaping the stones.
Foundation:
- Lay a concrete foundation to support the weight of the stone. Ensure it is level and adequately cured before proceeding.
Building the Frame:
- Start laying the stones on the foundation, selecting and fitting them as you go. This process can be like solving a puzzle, as natural stones are irregular.
- Use mortar to fix the stones in place, filling the gaps between them.
Reinforcement:
- For additional strength, incorporate metal rebar or mesh within the structure, especially if building tall or wide walls.
Countertop and Appliance Support:
- Create a level surface on top of the stone frame for the countertop. This might involve a concrete slab or a metal frame inset into the stone structure.
- Plan for appliance cutouts, ensuring the stone frame can support their weight and size.
Finishing:
- Once the stone work is complete, clean off any excess mortar and make final adjustments for a neat appearance.
- Seal the stones if necessary to protect them from weather and staining.
Manufactured Stone Veneer Frame
Manufactured stone veneer offers a lighter and often more uniform alternative to natural stone, and is easier to work with due to its consistency.
Steps for building with manufactured stone veneer:
Structural Frame:
- Begin with a structural frame made of wood, galvanized steel, or concrete blocks, which will support the veneer.
- Ensure this frame is stable and well-anchored to support the additional weight of the veneer.
Preparing for Veneer Application:
- Apply a layer of water-resistant barrier over the frame, followed by a wire mesh to provide a good base for the mortar.
Applying the Veneer:
- Mix the mortar according to manufacturer’s instructions.
- Apply mortar to the back of the veneer stones and press them onto the wire mesh.
- Work in small sections, carefully fitting the veneer pieces together.
Grouting and Finishing:
- Once all the veneer is in place, fill the joints with grout, or you can choose a dry-stack look without visible grout lines.
- Clean any excess mortar and grout for a finished look.
Countertop and Appliances:
- Install a countertop, which can be concrete, stone, or other materials, ensuring it’s properly supported by the frame.
- Fit appliances into the designated spaces, making sure they are securely anchored.
- Both natural stone and manufactured stone veneer frames provide a high aesthetic value, blending seamlessly with outdoor environments. The natural stone requires more skill in stone selection and placement, whereas manufactured stone veneer offers more uniformity and easier installation but still maintains a natural look. In both cases, planning for weight distribution, appliance integration, and proper structural support is crucial for a durable and safe outdoor kitchen.

Modular Systems: Prefab Outdoor Kitchen Kits, Modular Stainless Steel Cabinets
Prefab Outdoor Kitchen Kits
Prefab outdoor kitchen kits are a convenient and often cost-effective way to build an outdoor kitchen. These kits come pre-designed with various components that can be assembled relatively easily, making them a popular choice for DIY enthusiasts.
Steps for building with Prefab Outdoor Kitchen Kits:
Selection and Planning:
- Choose a prefab kit that fits your outdoor space and meets your cooking and entertainment needs.
- Consider the size, layout, and features included, like grills, sinks, and storage areas.
Foundation Preparation:
- Ensure a level and stable surface for installation. This might be an existing patio or a newly poured concrete slab.
Kit Assembly:
- Follow the manufacturer’s instructions to assemble the kitchen components.
- This usually involves connecting large sections or modules, which can include cabinets, countertops, and appliance spaces.
Utility Connections:
- Arrange for professional installation of gas, water, and electrical lines if needed.
- Ensure all connections are safe and meet local building codes.
Finishing and Customization:
- Add any custom features or additional components, such as side burners, refrigerators, or bar areas.
- Decorate and furnish the outdoor kitchen area to match your style.
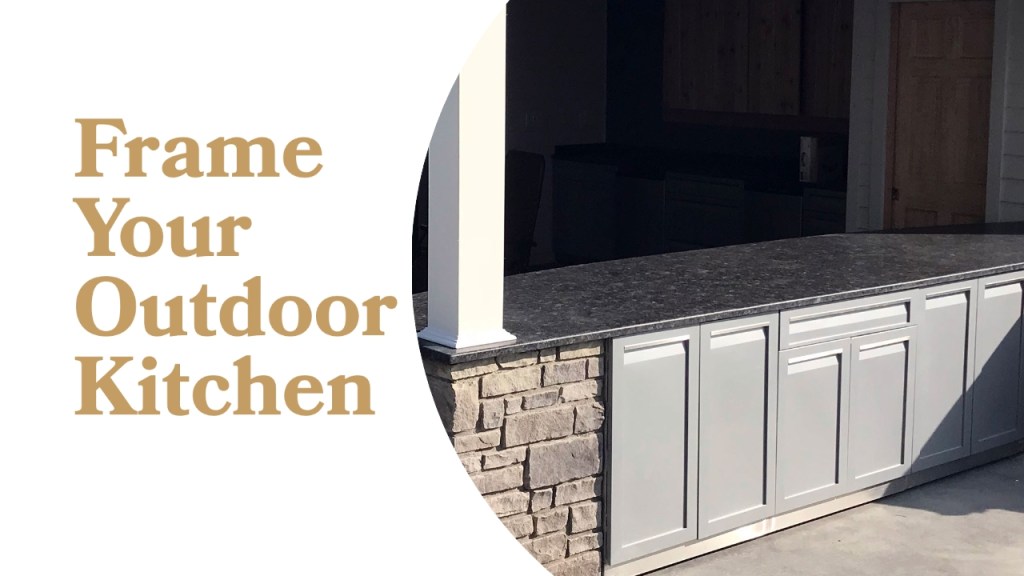
Modular Stainless Steel Cabinets
Modular stainless steel cabinets provide a modern, sleek look and are highly durable and resistant to the elements, making them an excellent choice for outdoor kitchens.
Steps for building with Modular Stainless Steel Cabinets:
Design and Planning:
- Decide on the layout and components you want in your outdoor kitchen.
- Choose modular stainless steel cabinets that fit your space and needs, considering size, storage options, and appliance compatibility.
Foundation Preparation:
- Prepare a level surface for installation. This can be a concrete slab or any stable, flat outdoor surface.
Cabinet Assembly and Layout:
- Assemble the cabinets according to the manufacturer’s instructions.
- Position the cabinets in the planned layout, making sure they are level and securely positioned.
Countertop Installation:
- Once the cabinets are in place, install a countertop of your choice. Granite, concrete, and stainless steel are popular options.
- Ensure the countertop is securely attached and level.
Appliance and Utility Installation:
- Install appliances such as grills, sinks, and refrigerators into the designated spaces within the cabinets.
- Connect utilities like gas, water, and electricity, adhering to safety standards and local codes.
Finishing Touches:
- Add any additional features such as lighting, seating, or decorative elements.
- Ensure everything is tightly secured and ready for use.
Both Prefab Outdoor Kitchen Kits and Modular Stainless Steel Cabinets offer:
- Ease of assembly and customization, making them suitable for DIY projects.
- Durability and resistance to outdoor conditions.
- Flexibility in design, allowing for a range of layouts and features.
- The need for careful planning in terms of space utilization and utility connections.
Prefab kits are often more straightforward to assemble but may offer less customization, while modular stainless steel cabinets provide a high degree of flexibility and a modern aesthetic. Both options reduce the complexity involved in building an outdoor kitchen from scratch.
Thank you for reading! If you have any questions we are always happy to help!
More From Our Blog:
Send us a picture and dimensions of your space to designhelp@4lifeoutdoor.com. We can place the cabinets into the picture for you to see exactly how it would all look!
Any help you need, we’re here to give our expertise.
Looking forward to hearing from you,
4 Life Outdoor team